Setting up MacOS Development environment
내가 기억하려고 적는 맥북 개발환경 세팅기 👩🏻💻
MacOS info
macOS Catalina 10.15.6
Date: 2020.09.16
Update: 2020.10.14
OS settings
언어 설정
- 환경 설정 - 지역 및 언어 - 영어를 기본으로 설정
맥북 내 환경설정
Keyboard-Text우측 체크박스 전체 다 체크 해제- 특히
Use smart quotes and dashes- 복붙시 따옴표 바뀌는거 방지
- 특히
Accessibility-Pointer Control-Trackpad Options...Enable dragging을three finger drag로 설정
Finder
- Finder 실행 후
Preferences-New Finder windows show: 기본 폴더 설정- Finder 최초 실행 시 버벅임이 없어짐
Preferences-Advanced-show all filename extensions- Downloads 폴더 이동 후 ` View
-View Option`Group by:Date addedSort by:Name
Terminal

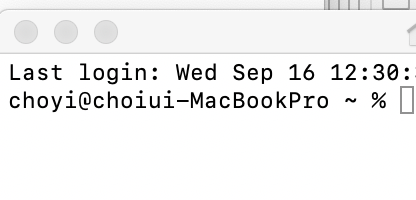
- choiui 이 부분 .. ^^
누구 맘대로 choi래 - 상단바 -
System Preferences-Sharing-Edit
₩ 대신 항상 ` 입력하기
같은 키를 눌러도 한글일 땐 ₩가 출력되고, 영어일 땐 `가 출력되는데 항상 `가 출력되도록 설정
$ cd ~/Library
$ mkdir KeyBindings
$ cd KeyBindings
$ touch DefaultKeyBinding.dict
$ vi DefaultKeyBinding.dict
vi 편집기로
{
  "₩" = ("insertText:", "`");
}
아래 내용 입력 후 OS 재시작
확장자별 기본 프로그램 설정하기
.html 파일 클릭하면 chrome이 아니라 vscode가 떴으면 좋겠고,
.md 파일 클릭하면 xcode가 아니라 typora가 떴으면 좋겠어서 설정
해당 확장자 파일 우클릭 - Get Info - Open with - 해당 .app으로 바꿔줌 - Change All... 클릭
(Get Info를 누르지 않고 우클릭-Open with로 바꾸면 확장자별이 아니라 그냥 그 파일 한개만 해당 프로그램으로 여는 것)
Terminal settings
Homebrew 설치
Terminal
$ /usr/bin/ruby -e "$(curl -fsSL https://raw.githubusercontent.com/Homebrew/install/master/install)"
$ brew doctor //로 정상 동작 확인
그리고 나면
Downloading Command Line Tools for Xcode
Downloaded Command Line Tools for Xcode
Installing Command Line Tools for Xcode
Done with Command Line Tools for Xcode
Done.
이러면서 알아서 Command Line Tools도 설치해줌
설치 안 됐을 경우
$ xcode-select --install로 설치
vscode PATH 추가
터미널에서 code 명령어로 vsc 열 수 있음
VSC 실행 후 ⇧⌘P 눌러서 Command Palette 열고
shell command 입력 - Shell Command: Install 'code' command in PATH 실행
터미널 재실행
iTerm2 설치
$ brew cask install iterm2
zsh, Oh My Zsh 설치
Terminal - zsh 설치
$ brew install zsh
Terminal - Oh My Zsh 설치
$ sh -c "$(curl -fsSL https://raw.github.com/robbyrussell/oh-my-zsh/master/tools/install.sh)"
설치하면
(어쩌구저쩌구)
[oh-my-zsh] If the above didn't help or you want to skip the verification of
[oh-my-zsh] insecure directories you can set the variable ZSH_DISABLE_COMPFIX to
[oh-my-zsh] "true" before oh-my-zsh is sourced in your zshrc file.
가 뜨는데 시키는대로 ZSH_DISABLE_COMPFIX를 true로 설정해주면 됨
.zshrc 파일 설정
콘솔 행동 제어, 커스터마이징 가능
$ code ~/.zshrc
세번째줄에
ZSH_DISABLE_COMPFIX="true" 추가
solarized oh my zsh
여기 들어가서 Solarized Dark theme 클릭 후 .itermcolors 확장자로 저장
iTerm - Preferences - Profile - Colors - Color Presets...
다운로드 받은 itermcolors 파일 import
material theme
색이 이게 더 예뻐보여서… 컬러 프리셋 이것도 여기서 받았다
powerlevel10k
$ git clone https://github.com/romkatv/powerlevel10k.git $ZSH_CUSTOM/themes/powerlevel10k
~/.zshrc 파일 가서 맨 마지막에 ZSH_THEME="powerlevel10k/powerlevel10k" 로 수정
iTerm 껐다 켜면 폰트 설치해주고, 재시작 후
Preferences - Profile - Text 가서 다운받은 폰트로 변경해주면 폰트 안깨짐
iTerm에서 username 안 뜨게 하기
~/.zshrc 파일에 prompt_context() {} 추가
iTerm VSC에 추가하기
우선 테마부터…
-
VSC -
Extensions- “Material Theme” 설치 -
Settings-Color Theme- Material Theme Ocean 선택
콘솔 테마 바꾸기
Settings- shell 검색Terminal > Integrated > Shell: OSX찾아서Edit in settings.json클릭"terminal.integrated.shell.osx": "/bin/zsh"따옴표 안에 저렇게 써주기
폰트 깨지는거 고치기
Settings- font family shell 검색- MesloLGS NF 입력
Git settings
git 설치
mac에는 기본적으로 git이 설치되어있지만,
git --version해보면 Apple 전용 오래된 git이 깔려있음
$ brew install -s git //오버라이드 옵션
$ brew info git
	// Options에서 pcre에 체크표시 되어있는지 확인, 없으면 설치해야함
$ git --version
	// git version 2.24.3 (Apple Git-128) 아까 확인한 옛날 버전이 뜬다면
$ which git
	// /usr/bin/git -> Apple one
$ export PATH=/usr/local/bin:$PATH
$ which git
	// /usr/local/bin/git -> New one
$ git --version
	//git version 2.28.0
git 초기설정
//개인정보 설정
$ git config --global user.name "your name"
$ git config --global user.email "your email"

//한글 파일명 처리 위한 설정
$ git config --global core.precomposeunicode true
$ git config --global core.quotepath false
VSC Extensions
-
C/C++
- c, c++ 빌드 & 컴파일
How to compile C/C++ on MacOS
-
VSC Extensions 중 C/C++ 다운로드
-
워크스페이스에 프로젝트 하나 만들기 (Open folder - new folder - open)
-
파일 추가 helloworld.cpp
-
상단표시줄에서 Terminal - Configure tasks - Create task.json file from template - Others 선택
-
{
    // See https://go.microsoft.com/fwlink/?LinkId=733558
    // for the documentation about the tasks.json format
    "version": "2.0.0",
    "tasks": [
        {
            "label": "echo",
            "type": "shell",
            "command": "echo Hello"
        }
    ]
}
이런 내용이 기본적으로 불러와지는데
-
{
	"version": "2.0.0",
	"tasks": [
		{
			"type": "shell",
			"label": "C/C++: g++ build active file",
			"command": "/usr/bin/g++",
			"args": [
				"-g",
				"${file}",
				"-o",
				"${fileDirname}/${fileBasenameNoExtension}.exe"
			],
			"options": {
				"cwd": "${workspaceFolder}"
			},
			"problemMatcher": [
				"$gcc"
			],
			"group": {
				"kind": "build",
				"isDefault": true
			}
		},
		{
			"type": "shell",
			"label": "Run C++",
			"command": "${fileDirname}/${fileBasenameNoExtension}.exe",
			"group": {
				"kind": "test",
				"isDefault": true
			}
		}
	]
}
위 내용으로 덮어씌운 후 저장 출처
- 상단표시줄에서 Terminal -
Configure default build task-C/C++ :g++ build active file
단축키 설정하기
Ctrl+K Ctrl+S 눌러서 단축키 설정 창 띄움
오른쪽 맨 위 추가 버튼 클릭 - keybindings.json 이 열리는데
// Place your key bindings in this file to override the defaults
[
    //build
        { "key": "ctrl+alt+b", "command":"workbench.action.tasks.build"}
    //run
        { "key": "ctrl+alt+r", "command":"workbench.action.tasks.test"}
]
이렇게 단축키를 추가해줌.
cpp 파일 작성 후 빌드 - 런 단축키 쓰면 됨 !
*.dSYM 파일은 macOS의 debug symbols를 저장하는 파일. 무시하면 됨.
Homebrew로 설치하기
nodejs 설치하기
$ brew install node
이 때 npm은 자동으로 설치됨
express 설치하기
$ npm install express
tomcat 설치하기
$ brew install tomcat
실행할 때 필요한 주소 : /usr/local/Cellar/tomcat/버전명/bin
내 경우는 실행할 때
$ cd /usr/local/Cellar/tomcat/9.0.39/bin
$ ./catalina start //서버 시작
// localhost:8080 으로 접속
$ ./catalina stop //서버 종료
-
root path
/usr/local/Cellar/tomcat/버전명/libexec/webapps/ // 이 안에 새 디렉토리 생성 후 작업 -
root path 바꾸는 법
$ sudo vi /usr/local/Cellar/tomcat/버전명/libexec/conf/server.html

Host name="localhost" appBase="webapps"
//"webapps" 를 "원하는 디렉토리" 로 바꿔주면 된다